How to build your personal website using GitHub Pages and Jekyll on Windows
• • Reading time: 9 minutes
Last updated:
This is what I did to build my personal website using GitHub Pages and Jekyll.
The advantage of GitHub Pages and Jekyll is that it’s free and quite easy to set up. There are also tons of free themes you can use to make your website pleasant to look at.
In this tutorial, I will help you set up your personal website step-by-step. There are loads of website building tutorials out there, but I still wrote this one because I find many tutorials assume the reader has some knowledge of website building. In this tutorial, I will assume you have no prior knowledge of website developing or any programming language.
On this page
- Step 1: Set up GitHub Pages
- Step 2: Pull repository for local editing
- Step 3: Install Jekyll
- Step 4: Initialise website using Jekyll
- Step 5: Edit your website
- Step 6: Adding new pages and posts
- Step 7: Change the theme
- Step 8: Deploy your page
Step 1: Set up GitHub Pages
The first thing we need to do is set up GitHub Pages. Go to GitHub and register an account. GitHub is an internet hosting service for all kinds of coding. You will probably find it useful for other purposes, too!

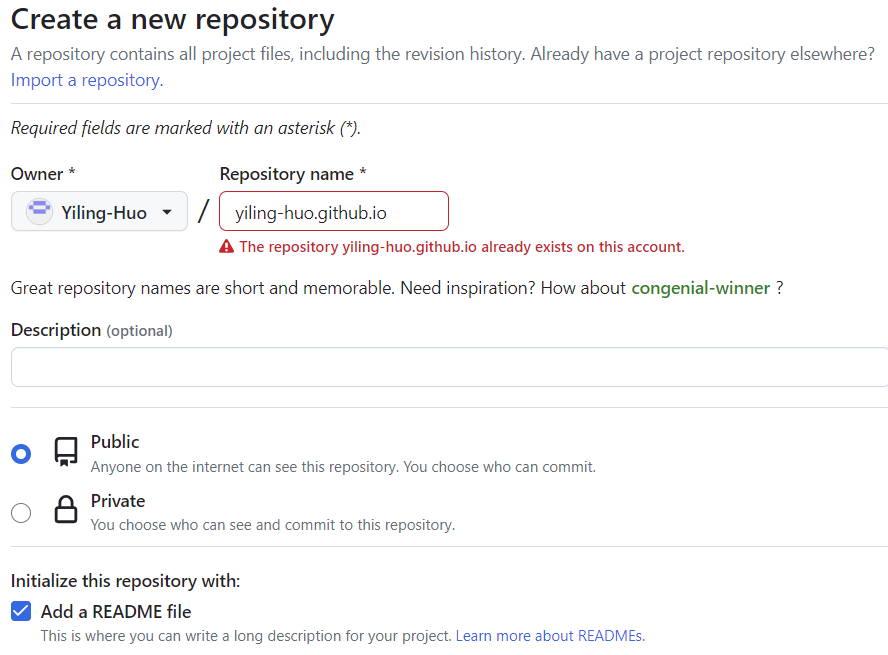
After registering, go to your github page and create a new repository.

On the create new repository page, you must name your repository with <your user name>.github.io. Naming your repository this way will allow GitHub to know this is a repository for GitHub Pages, GitHub’s site hosting service. If you have capital letters in your user name, those need to be in lower case. (My repository already exists, so there is an error.) Make sure your repository is public, and select Add a README file. The repository needs to be public because only public repositories can use GitHub Pages for free. Adding a README file is technically not necessary for our purpose, but it makes sure that there is some file in your repo so it’ll be easier when you clone your repository to your local directory.
Step 2: Pull repository for local editing
Next, we will need to pull the GitHub repository to a local directory. Go to Git for Windows and download Git for Windows. Git for Windows allows you to use the version control system Git on the Windows operating system. In other words, it will allow you to download your GitHub repository to your local directory, edit things locally, and upload your local directory to your GitHub repository. (I also use GitHub Desktop on top of Git for Windows to make things easier.)
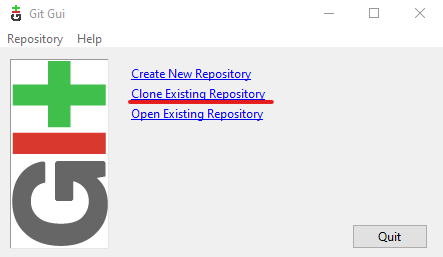
While installing Git for Windows, we don’t need to change any settings. After installing, go to your list of apps, open Git GUI, and select Clone Existing Repository.

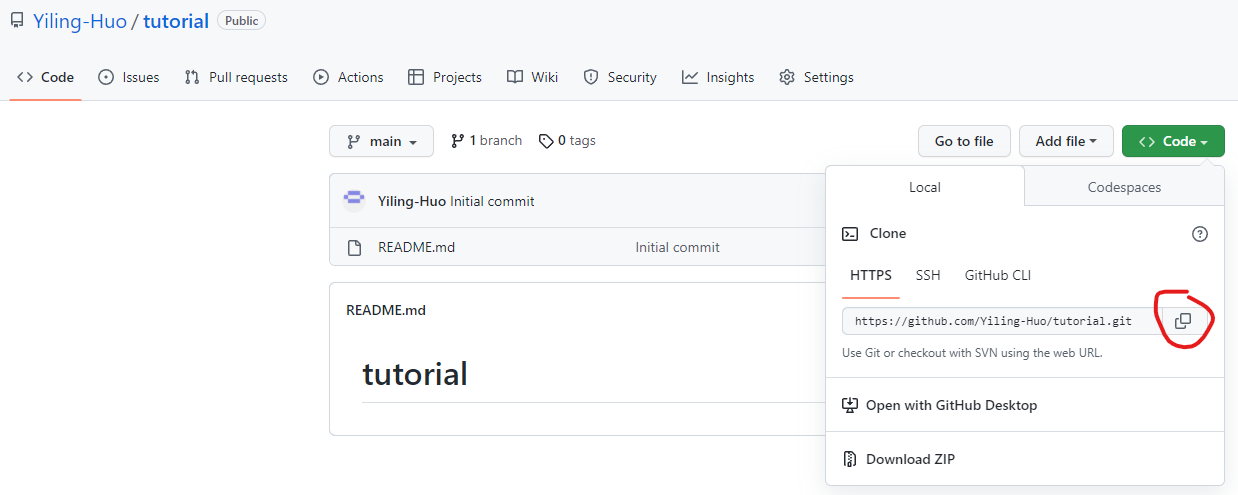
Go to your GitHub repository, copy the url, and paste to Source Location in Git GUI. Write down your target local directory in Target Directory. Note that your local directory must not already exist. Then click Clone.
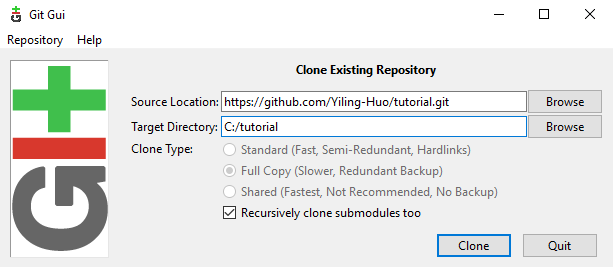
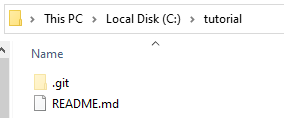
After cloning, your local directory should have been created. Inside, you will find a hidden folder named .git and your README file.
Step 3: Install Jekyll
Next, we need to install Jekyll. Jekyll is a static site generator, written in Ruby. On Windows, go to Jekyll on Windows and follow the steps:
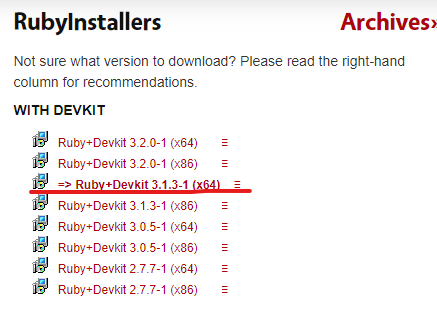
First, go to RubyInstaller and download and install Ruby + Devkit 3.1.3.
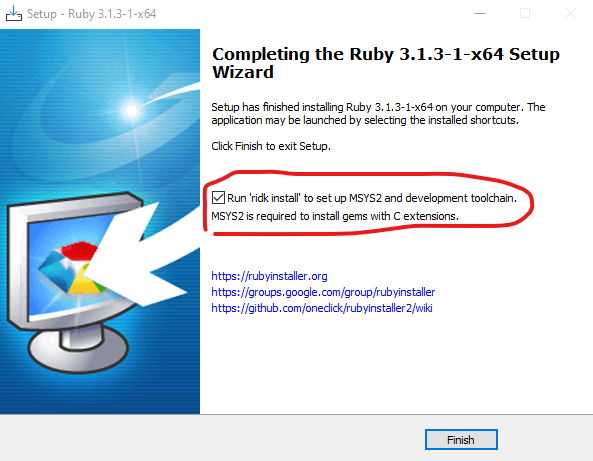
At the last stage of installation wizard, select the Run ‘ridk install’ option.
Then, enter option 3: MSYS2 and MINGW development toolchain
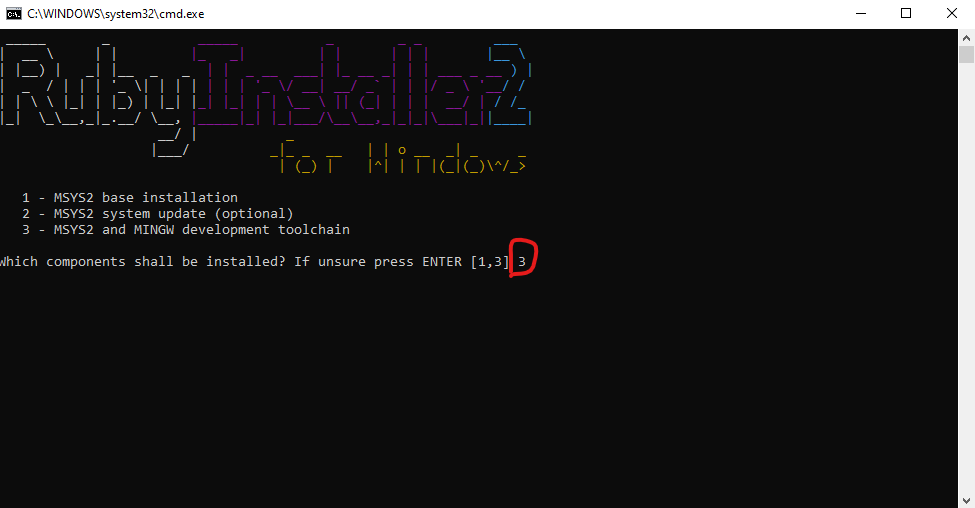
After installing MSYS2 and MINGW development toolchain, press ENTER to exit.

open another command prompt, run gem install jekyll bundler.

Jekyll should be installed. Run jekyll -v to check if Jekyll is properly installed. Properly installed, the message should show current Jekyll version.

Step 4: Initialise website using Jekyll
Search cmd in your Start menu to open a command prompt.

In the command prompt, go to your local directory for your website (the one we just cloned from GitHub).
Upon opening a command prompt, you will be located to one of your local drives. If your directory is not in the same drive, simply put <Drive>: in the command line (then press enter) to move to the correct drive. Then, run cd <your directory> to go to your directory.

Run jekyll new --skip-bundle . --force to initialise your website.

After initialising, you should see these files in your folder:
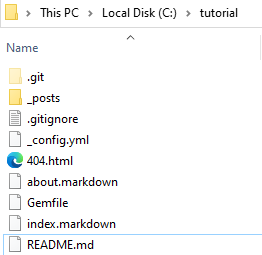
Some very important files for your website are (from Samuel Flender’s tutorial):
- Gemfile contains the gem dependencies required to execute Jekyll,
- _config.yml is the Jekyll configuration, which determines how your site will look like, and
- index.md is the homepage of your website. This is where you’ll add your first content.
We will need to make some small changes to make sure the website runs smoothly with GitHub Pages.
Inside the Gemfile, comment out this line:
#gem "jekyll", "~> 4.2.2"
And add these two lines:
gem "github-pages", "~> 227", group: :jekyll_plugins
gem "webrick", "~> 1.8"
To open the Gemfile, simple right click and select open with any text editor (Notepad, for example). To comment out simply means to put a ‘#’ at the beginning of the line. Your Gemfile should look like this:

Then, inside _config.yml, comment out these two lines. We won’t need these because GitHub Pages will automatically set these urls.
# baseurl: ""
# url: ""

Lastly, in the command prompt, run bundle install:

This will install all the needed dependencies (gems).
Step 5: Edit your website
If you want to use a theme other than the Jekyll default minima, read Step 7: Change the theme first.
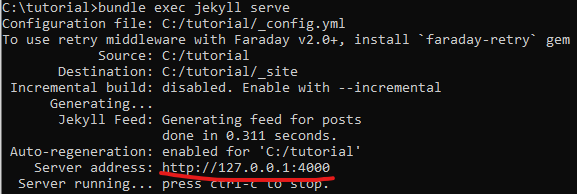
Let’s first take a look of the initial website Jekyll has created for us. In the command prompt, run bundle exec jekyll serve. This will generate a local url for your website. Copy the url to a browser and take a look:

We have a home page made using Jekyll’s default theme, called minima. It’s a minimalist theme suitable for many purposes. In the home layout, as we are seeing here, we have a header that navigates around our website, some content (empty for now), a module that shows all of our posts (for now, we have the auto-generated example post), and a footer of our website information.
Now, let’s try editing this page. To edit the elements shown on the page, we need to open _config.yml and index.markdown. Inside _config.yml, notice these variables:
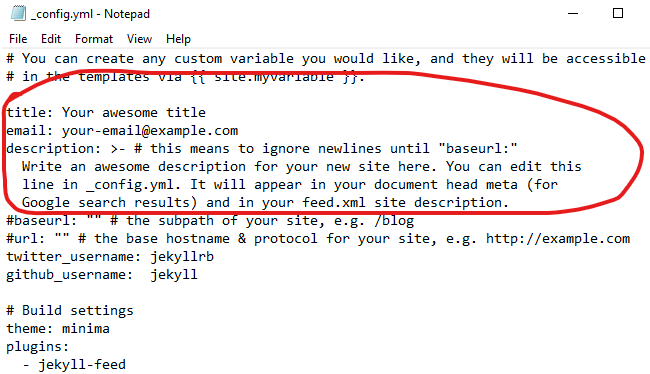
Edit these variables to edit the header and footers. Note that any changes to _config.yml will require re-running bundle exec jekyll serve to take effect.
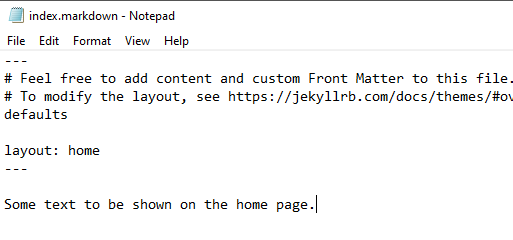
Page files such as index.markdown have two main components, the YAML header and the content. The YAML header is enclosed in triple dashes on either side. Inside the YAML header, you can set values for various variables for your page. For now, the only variable specified is layout:. We can add more variables such as title: or permalink: for other pages. The home page does not need a permalink:.
After the YAML, we can simply add some content to be shown on the home page. Because this is a markdown file, we can use both markdown syntax and html syntax. For example, to make my text bold, I can simply put **text**.
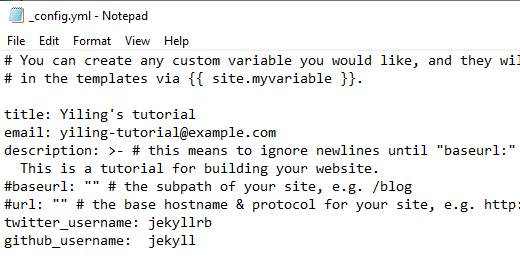
I have made some changes two these two files and the website now looks like this:

You may find it easier to edit markdown files in another text editor app rather than the Windows notepad, VS Code for example.
Step 6: Adding new pages and posts
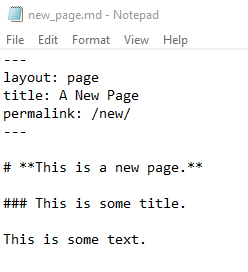
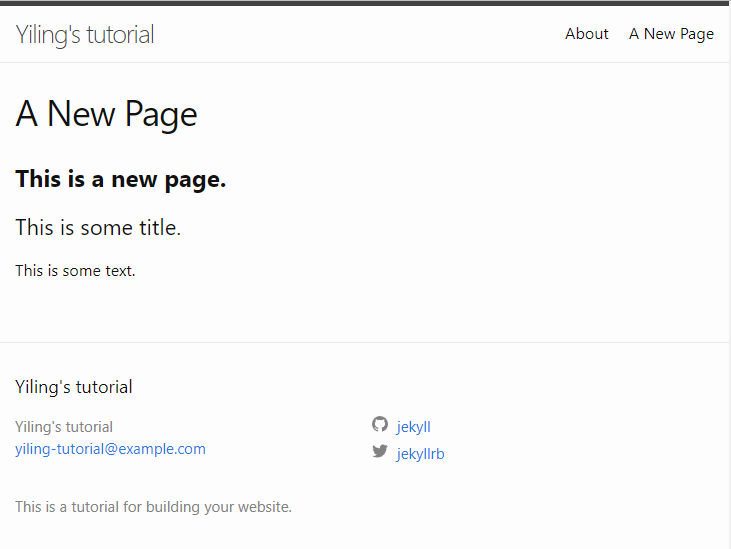
To add a new page, simply create a new markdown file. To do this without an editor app, simply create a new text file and change the extension to .md. For example, I have created new_page.md and it looks like this:
To add a new blog post, create a file in the _posts folder, following the Jekyll post naming format: YEAR-MONTH-DAY-title.MARKUP, for example 2012-09-12-how-to-write-a-blog.md. More details here.
Step 7: Change the theme
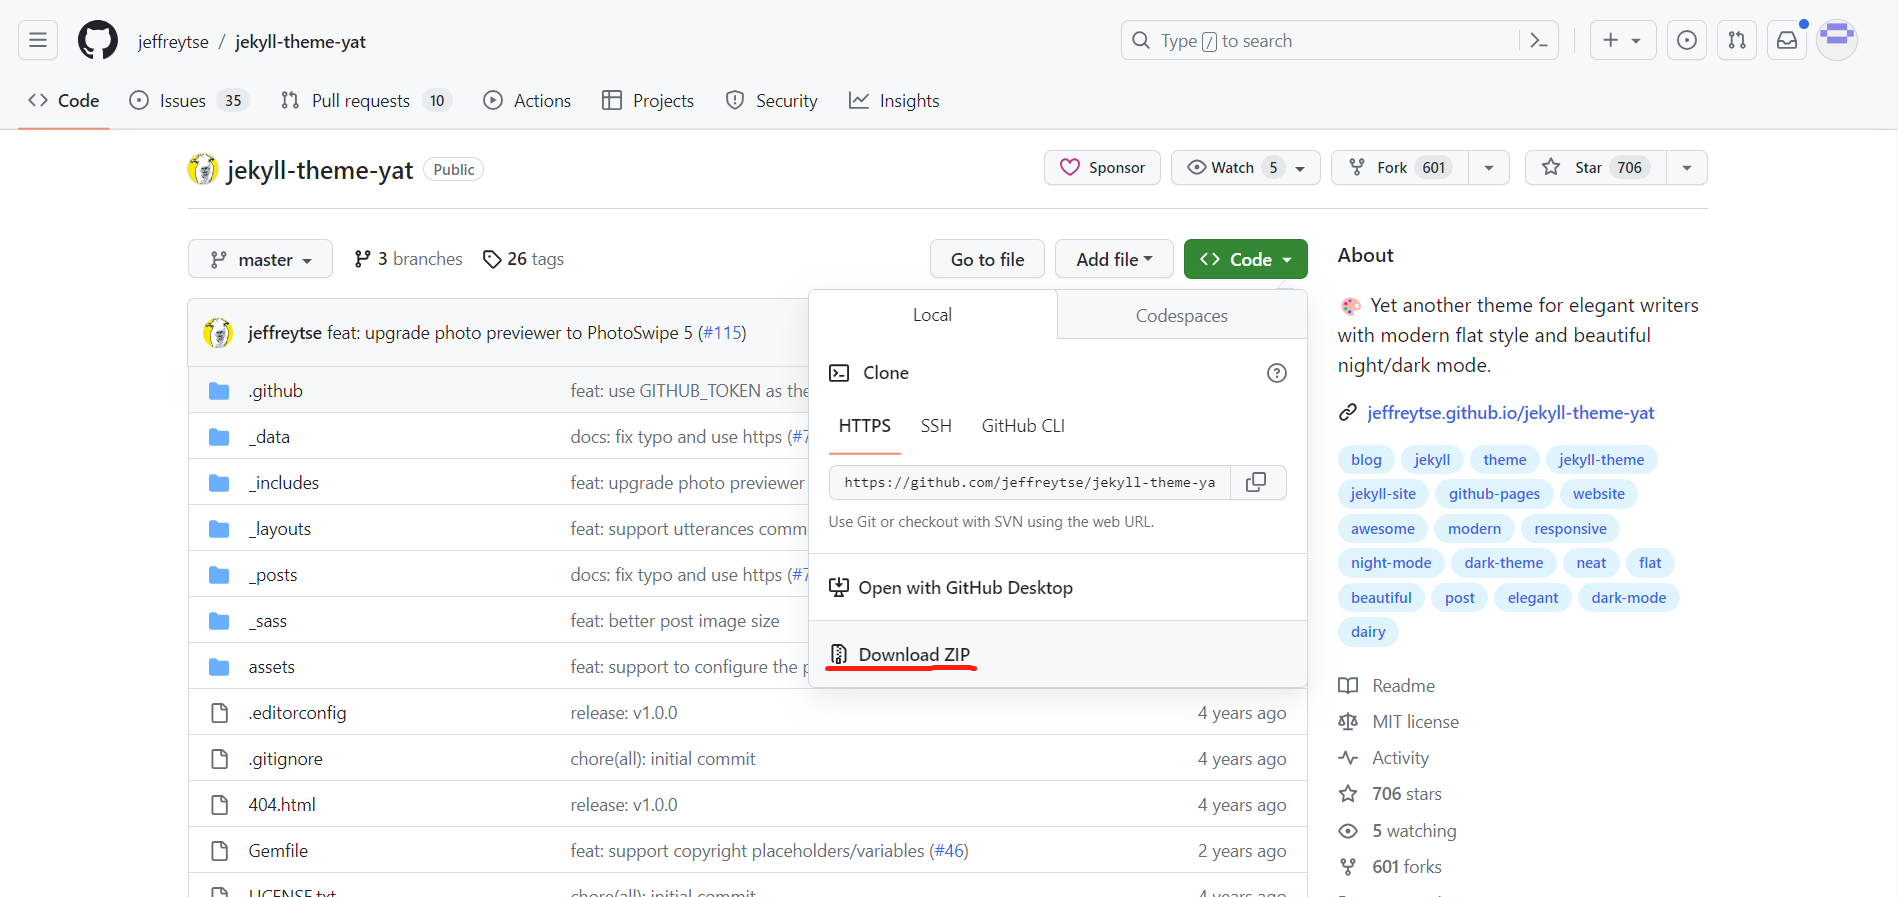
There are many free Jekyll themes you can use. If the theme exists on GitHub and has a license that allows you to use, you can simply clone the theme’s repository, edit, and push to your repository. The most brain-less way to do this is to go to the theme’s GitHub page, download the files as a .zip and copy everything to your website’s directory. (An alternative way is to fork the theme’s repository directly on GitHub.)
Here I’ll demonstrate how to do this with the YAT theme. First, go to the theme’s GitHub page, and download the code as .zip.
Next, clone your website’s GitHub repository to your local directory. Replace all content in your directory with the theme’s files. The next thing to do is to install all the gems needed for this theme by running bundle install in a command prompt. Then, serve it locally by running bundle exec jekyll serve to have a look.
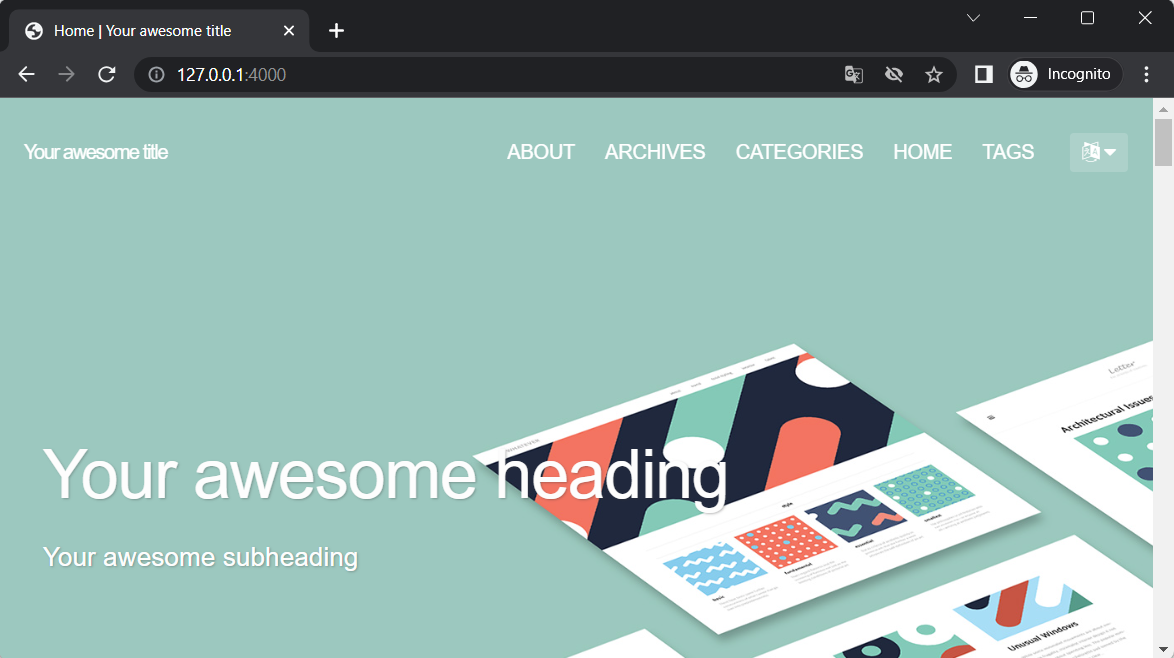
Edit the pages as you see fit: edit _config.yml, edit index.md (or index.html in this case), add pages, add posts in the _posts folder, edit layouts in the _layouts folder, etc.
After you’re done, follow the next steps and deploy your pages.
Do not forget to credit the theme creators!
Step 8: Deploy your page
After editing your pages locally, you need to deploy the pages to GitHub Pages. In a command prompt, run these lines (one by one). For “notes”, write down a brief description of what you have done with the files, for example “initial build”. This will create a new branch called ‘master’ in your repository, and upload everything.
git add .
git commit -m "notes"
git push origin master
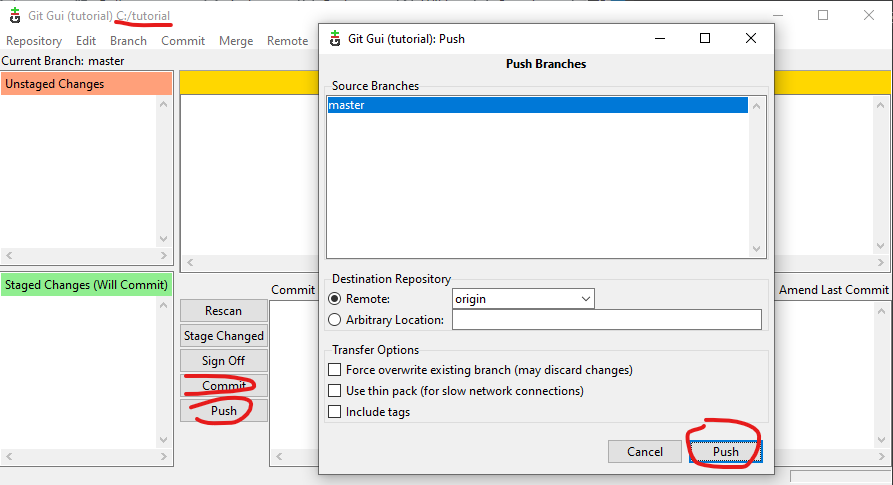
Or you can use Git GUI to push to your repository. In Git GUI, select open existing repository and find your local directory. Then, scan for changes, add a commit message, commit the changes, and push to your remote repository.
On GitHub, in your repository, go to Settings - Pages - Branch. Select the branch you just pushed to, and save.

Under Actions, you should see that GitHub is trying to build the website. When the orange dot turns green. Your website is ready!

Now everyone can access your website using your url /
Have some patience, and have fun!